Best Photography Spots in Namibia (2026 Guide)
As an Amazon Associate, ExifGrabber earns from qualifying purchases.
Why Namibia belongs on your list
Namibia is one of the few places left where you can point a camera at empty land and get a genuinely alien-looking frame. Towering red dunes, a coastline littered with shipwrecks, granite domes that glow at sunset, and one of the least light-polluted skies on the planet. It's also one of the easier African countries to self-drive, which matters a lot if you want to be standing at Dune 45 before sunrise instead of waiting on a group tour bus.
This guide covers the locations worth building an itinerary around, when to go, and what gear actually holds up in Namib dust. It's not a full astrophotography tutorial (Spitzkoppe deserves its own guide for that), just a practical location-by-location breakdown.
Best time of year
Namibia's dry season, roughly May through October, is the window most photographers should target. Skies stay clear and saturated blue, dust in the air during golden hour throws warm, textured light across the dunes, and in Etosha the thinning vegetation pushes wildlife toward waterholes where you actually have a clean background to shoot against. April, August, and October come up repeatedly in trip reports as the sweet spot for contrast and light.
The trade-off is temperature. Desert nights and early mornings get genuinely cold in the dry season, even though the days are warm, so you'll want real layers for pre-dawn shoots at Sossusvlei. The green season (November to April) brings dramatic cloud formations and lush color if you're after a different look, but wildlife scatters and some roads get harder to manage after rain.
Golden hour in Namibia is worth planning your whole day around. The 20 to 30 minutes before sunrise and after sunset produce the softest tones, and the hour on either side of sunrise/sunset is when the dune colors go from orange to something closer to red. If you're checking your shots afterward and want to confirm exactly what settings you used at that light, ExifGrabber's EXIF viewer will pull the aperture, shutter speed, and ISO straight out of the file in your browser, which is useful for figuring out what actually worked once you're back reviewing images on a laptop.
Sossusvlei and Deadvlei
This is the shot everyone comes for: bone-white clay pan, black skeletons of 900-year-old camel thorn trees, and dunes behind them that shift from orange to deep red depending on the light. Deadvlei and Dune 45 are the two anchor locations, and both reward getting there before the gates technically open for everyone else.
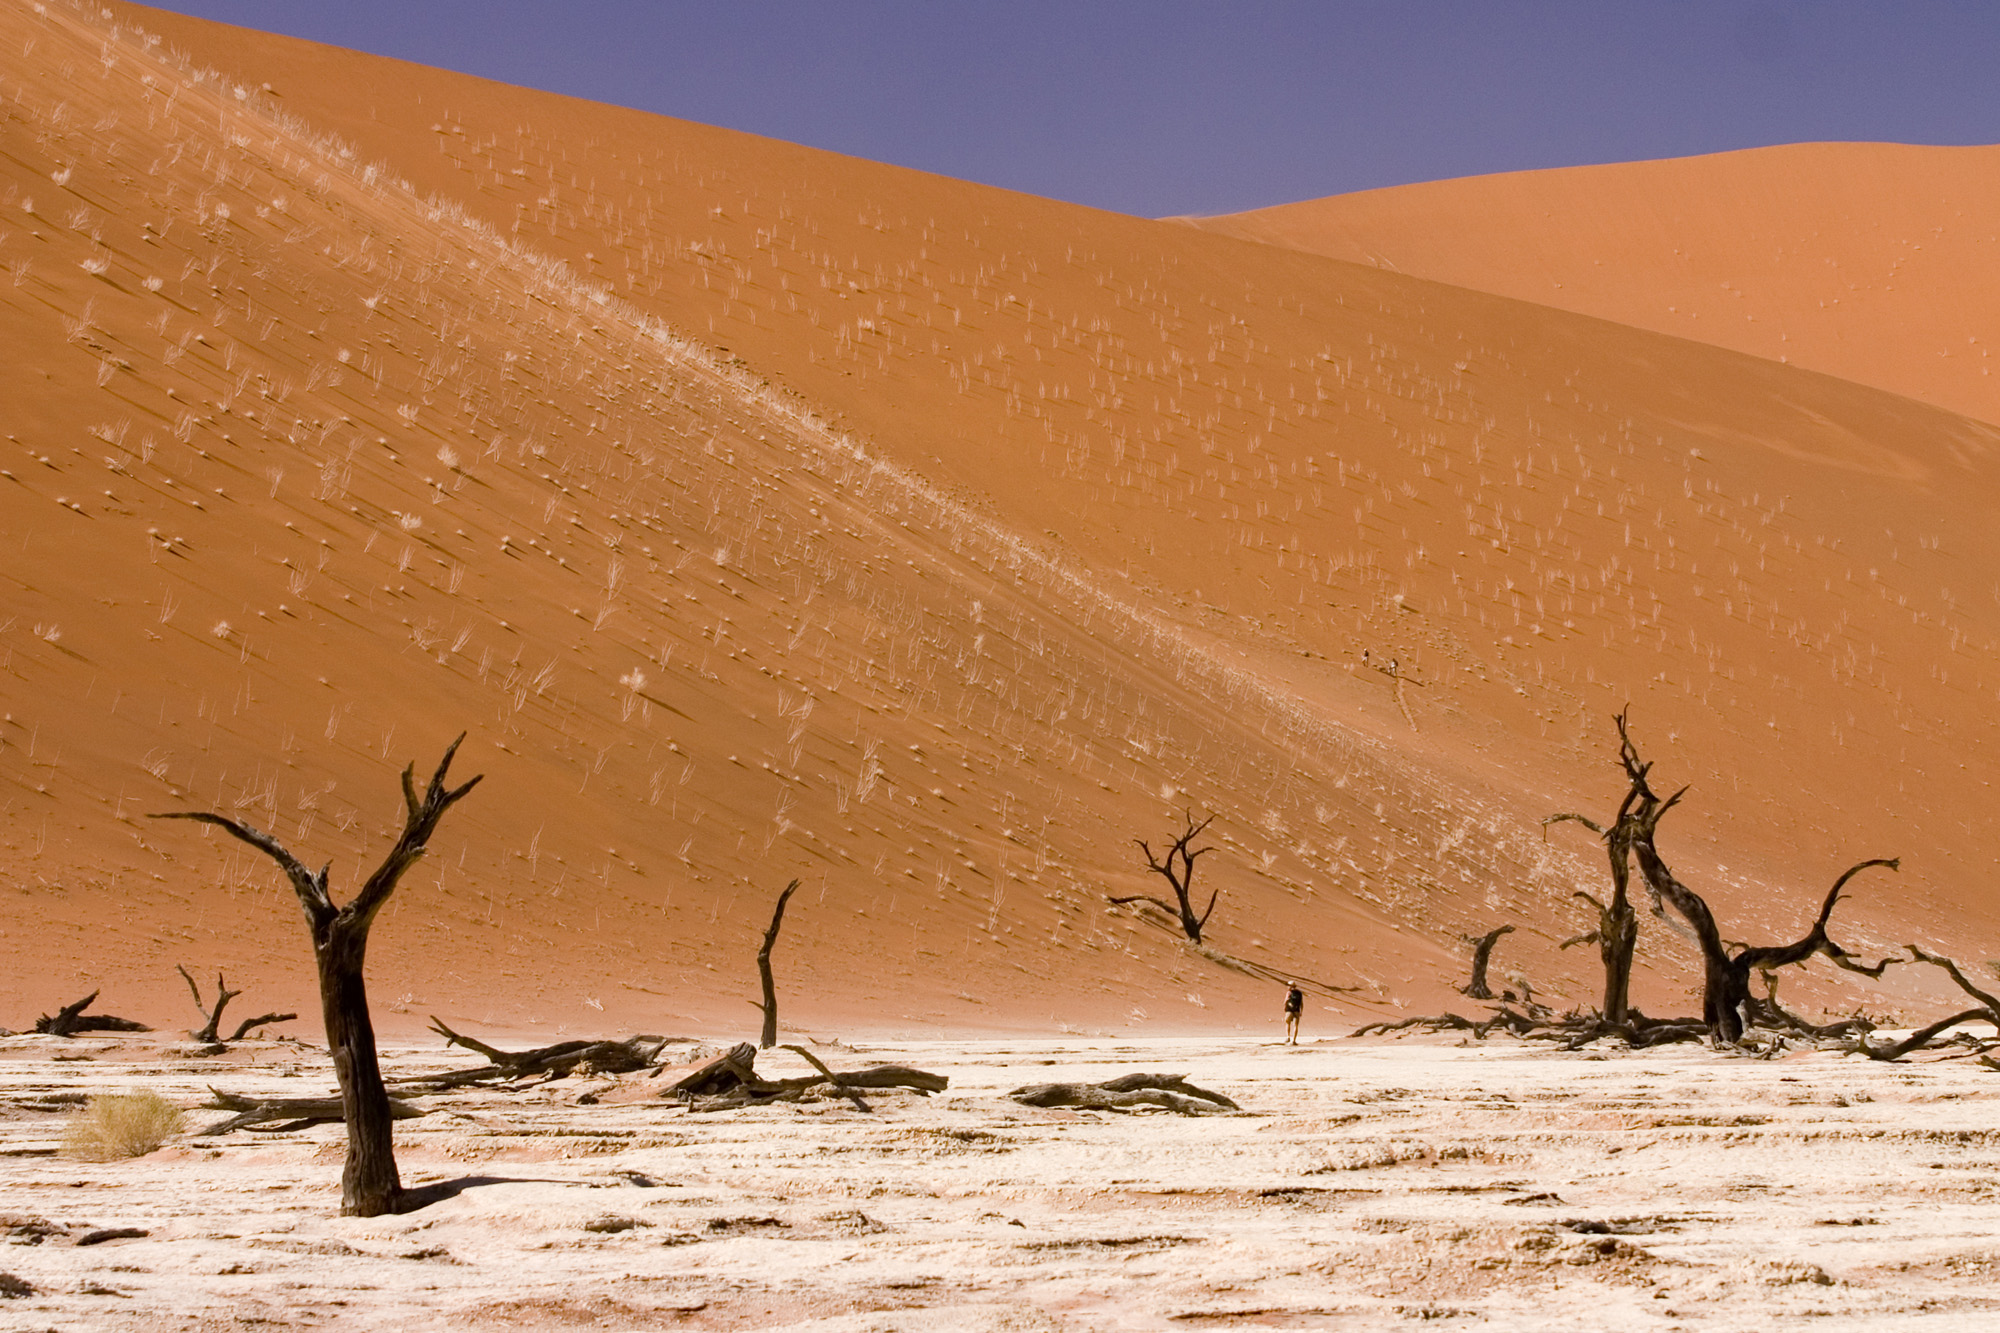
Practical notes:
- Stay inside the park gate if you can (lodges like Little Kulala sit near the Sesriem entrance) so you're not waiting in a queue of vehicles at gate opening.
- The walk from the 2x4 parking area to Deadvlei is about 1.5 km through soft sand. Budget more time than you think, especially carrying a tripod.
- Climb Dune 45 or Big Daddy for the classic ridge-line silhouette shots, but know that Big Daddy is a serious hour-plus climb in soft sand.
- A wide-angle lens in the 16-35mm range captures the scale of the dunes and pan; a mid telephoto (70-200mm) is useful for compressing dune ridgelines into abstract layers of light and shadow.
- Entrance to Namib-Naukluft and the Sesriem/Sossusvlei area is paid at the Sesriem gate before you head into the dune area, and fees are typically valid for 24 hours from entry, so plan your sunrise and sunset shoots around a single gate pass where possible.
If you're building out a broader landscape kit before this trip, our guide to wide-angle lenses for landscape photography covers options that hold up well for dune and canyon work.
Etosha National Park
Etosha flips the trip from landscape to wildlife. The park is built around a massive salt pan, and during the dry season animals concentrate at waterholes because there's nowhere else to drink. Okaukuejo Rest Camp has a floodlit waterhole right at the camp perimeter, which means you can photograph rhino, elephant, and sometimes lion after dark without leaving the fence line.
Game drives happen in your own vehicle or an open 4x4, and the best light for wildlife is the same golden hour rule as everywhere else: first hour after sunrise, last hour before sunset. Bring a telephoto of at least 300mm if you want frame-filling wildlife shots rather than "animal somewhere in a big landscape" shots, and if you're moving from a landscape lens to a long lens mid-drive, keep both bodies loaded or accept you'll be swapping glass in a dusty vehicle more than you'd like.
Etosha's entrance fees changed as of April 2026 under the new Ministry of Environment, Forestry and Tourism schedule. As of this update, foreign visitors pay a daily park entry plus conservation fee per adult, with an additional daily vehicle fee, and permits are filled out at the gate while camp fees are settled at your accommodation. Rates change periodically, so confirm current pricing before you go rather than relying on last year's numbers.
The Skeleton Coast
North of Swakopmund, the Skeleton Coast is fog, shipwrecks, and seal colonies rather than the dry heat of the interior. The cold Benguela current keeps this stretch of coastline shrouded in mist for much of the morning, which actually works in your favor: diffused light is forgiving for shooting rusted shipwreck hulls and bleached whale bones without harsh shadows.
Access is more restricted here than in the south. Parts of the Skeleton Coast Park require a permit and, further north, guided access only, so check current entry requirements before you plan a self-drive route. A weather-sealed body matters more here than anywhere else in Namibia because you're dealing with salt air and fog rather than just dust. The Sony a7 IV is a common choice among travel photographers for this kind of trip. Sony markets it as dust and moisture resistant rather than fully weather-sealed, so it holds up reasonably well in the field, but it's not a substitute for keeping it out of driving rain or a sandstorm.
Fish River Canyon
In the far south, Fish River Canyon is the second-largest canyon in the world by most measures used for African canyons, and it's dramatically underphotographed relative to how good it looks at sunrise and sunset. The main viewpoint area near Hobas gives you layered rock strata that catch warm light in a way that reads almost like a miniature Grand Canyon, minus the crowds.
There's no scramble required for the classic shot; the main viewpoints are a short walk from parking. If you want the canyon floor and river bend in frame, arrive for either the first or last hour of light so the canyon walls hold texture instead of going flat under a high midday sun.
Spitzkoppe
Spitzkoppe is a cluster of granite inselbergs rising straight out of flat gravel plains, and it's one of the most photogenic single formations in the country. It's popular for landscape and Milky Way photography because there's essentially zero light pollution out there and the rock formations give you strong foreground interest for wide astro compositions, but even without touching night photography, sunrise and sunset here are worth the detour on their own. The rock face shifts from grey to deep orange in the last twenty minutes of light.
Camping is allowed at designated sites around the base, which is the easiest way to be in position for both sunset and the following sunrise without a long drive in the dark. Bring a headlamp with a red-light mode so you're not blowing out your night vision (or anyone else's long exposure) while setting up in the dark.
Damaraland
Damaraland is the least defined stop on this list in a good way. It's a huge, sparsely populated region of ochre-colored mountains, dry riverbeds, and scattered desert-adapted elephant and rhino populations. The light here has a warmth to it that's different from the dunes further south, more rust and burnt orange than the saturated red of Sossusvlei.
Twyfelfontein, with its ancient rock engravings, and the Organ Pipes rock formation are two specific stops worth building into a Damaraland day if you're driving through rather than just passing over it on the map.
Kolmanskop ghost town
Near Lüderitz in the far south, Kolmanskop is an abandoned German diamond-mining town that the desert has been slowly reclaiming since the 1950s. Sand now fills entire rooms up to the windowsills, and the combination of peeling paint, empty doorframes, and drifted sand makes it one of the most reliably interesting interior locations in the country.

Photography access is generally limited to specific tour windows plus an early photographer's permit that lets you in before the general tour groups, which is what you want since the light through the broken windows and doorways is the whole point. Bring a fast prime or a lens that handles low light well; interiors here are shadier and more contrast-heavy than anything else on this list, and a tripod is genuinely useful for balancing the exposure between blown-out window light and the dim room interiors.
Swakopmund
Swakopmund is the practical hub for the coastal half of a Namibia trip: fuel, food, gear shops, and a base for day trips to the Skeleton Coast and the Namib dunes that meet the Atlantic at Sandwich Harbour. The town itself has a distinct German colonial architecture that's worth an hour of wandering with a camera even if it's not the headline stop on your itinerary. It's also a sensible place to service or clean gear before heading back into dune country, since dust management gets harder the longer you're out in it.
Gear for desert and dusty conditions
Namibia is hard on equipment in a specific way: fine, wind-blown dust that works into zoom rings, hinges, and card door seals over a two-week trip. A few things consistently show up in trip reports as worth having:
- A dust-resistant camera body. As noted above, bodies like the Sony a7 IV are built with improved dust and moisture resistance, though no mirrorless body on the market is fully dust-proof, so lens and body swaps in open wind should be kept to a minimum.
- A rocket-style air blower, not a brush, for clearing dust off lenses and sensors in the field. The Giottos rocket air blower is a common recommendation because the nozzle stays rigid when you squeeze it, so you can direct airflow precisely instead of just waving a bulb near the glass.
- A well-sealed camera backpack. A Think Tank camera backpack is a reasonable option here; build quality on Think Tank's bags is generally solid, though dust resistance varies by model, so check the specific bag's seals and zip covers rather than assuming the brand name covers it.
- A circular polarizer. Cutting glare and deepening sky saturation matters a lot in a country this bright. Hoya circular polarizer filters are a solid mid-price option that comes up repeatedly in landscape photography gear comparisons, without the premium cost of top-tier B+W glass.
- A microfiber cloth and a dry bag or two for stashing bodies during vehicle transfers on gravel roads, where dust gets kicked up constantly.
If you're also doing long exposures on the coast or at the canyons, our guide to ND filters for long exposure photography is worth a look before you pack.
Logistics worth knowing before you go
Namibia rewards a self-drive itinerary more than almost anywhere else in Africa, but distances are longer than they look on a map, and gravel roads slow you down more than paved highways would. Build in buffer days rather than trying to hit every location on this list back to back.
Park fees changed in April 2026 across Namibia's national parks, with new per-adult and per-vehicle rates for foreign visitors, SADC citizens, and Namibians. Etosha permits are completed at the gate and fees are settled at camp, while Sesriem/Sossusvlei fees are paid at the visitor centre before you enter the dune area. Cash in Namibian dollars is accepted everywhere, and card payment is available at most main gates, though connectivity issues do happen, so carrying some cash as backup is worth it.
Once you're home and going through a full memory card of dune, wildlife, and ghost-town shots, it's worth checking which images actually carry GPS data, especially if you shot with a camera rather than a phone. ExifGrabber's GPS location extractor pulls coordinates straight out of a photo's metadata in the browser, which is a fast way to plot exactly where each shot was taken without uploading anything to a server.
A quick reference for planning
- Best overall window: May through October (dry season), with April, August, and October standing out for light quality.
- Sossusvlei/Deadvlei: arrive before gate crowds, budget extra time for soft-sand walking, bring wide and mid-telephoto glass.
- Etosha: dry season concentrates wildlife at waterholes; Okaukuejo's floodlit waterhole is worth a night stay on its own.
- Skeleton Coast: morning fog gives soft light; check current permit requirements before self-driving north.
- Fish River Canyon: short walk to strong viewpoints, shoot the edges of the day.
- Spitzkoppe: camp at the base for sunset-into-sunrise coverage, zero light pollution.
- Damaraland: slow down and treat it as a destination, not a drive-through.
- Kolmanskop: get the early photographer's access window if it's offered.
- Swakopmund: your logistics base for the coastal half of the trip.
Namibia isn't a place you rush. The best frames here come from being in position before the light shows up, not from chasing it once it's already good.