Flash Exposure Compensation Explained: A Practical TTL Guide for 2026
One control, one question: is the flashed subject too bright?
As an Amazon Associate, ExifGrabber earns from qualifying purchases.
Flash exposure compensation, often shortened to FEC, asks a TTL flash system to deliver more or less light than its automatic calculation. It is a correction to flash output, not a command to brighten every part of the photograph. If your subject is bright against a correctly exposed room, reduce FEC. If the subject is dark while the room looks right, increase it. If the whole frame is dark, first diagnose ambient exposure instead.
The distinction sounds small but saves a great deal of random dial turning. TTL means through-the-lens metering: the system measures a preflash, estimates the light needed, and then fires the main flash. Its decision can vary as the subject moves, the framing changes, or reflective objects enter the scene. FEC tells the system how to bias that decision. This guide uses portrait and fill-flash examples, but the reasoning applies to many TTL-capable flashes.
Camera brands differ in menus and in how ordinary exposure compensation interacts with flash. Nikon's documentation notes model-dependent coupling, while its camera manuals describe flash compensation as a separate adjustment. Check the behavior of your own camera and flash combination rather than assuming two dials are always independent.
Start with two exposures in mind
Picture a portrait beside a window. Existing daylight illuminates the room and background; your flash adds light to the person. The camera's shutter speed, aperture, and ISO determine the ambient exposure. Aperture and ISO also affect the flash-lit subject, and the flash's automatic or manual output determines how much additional light arrives. Shutter speed usually has little effect on the flash contribution at ordinary sync speeds because the flash pulse is much shorter than the exposure, but it changes the continuous light. High-speed sync is a different case and reduces available flash power.
Make a test shot without flash. Decide whether the background is as bright as you want it. It may be a little darker than your final subject, but should not be an accident. Turn on TTL and take a second shot from the same position. Now judge the subject separately from the background. If the background changed because the camera changed shutter speed or ISO automatically, lock down more exposure variables before attributing the difference to flash.
In manual camera exposure with a fixed ISO, you set the ambient baseline directly and can still use TTL flash. This is a useful learning combination. Manual camera mode does not force manual flash mode. Conversely, FEC generally will not adjust a flash set to manual power. In manual flash, set the power on the unit or trigger instead.
Make a controlled first test
Choose a stationary subject near a window or in open shade. Set the camera to manual exposure, use a shutter speed within its normal flash-sync limit, and select an aperture and ISO that make the unflashed background look intentional. Begin with a modest setting such as 1/160 second, f/4, ISO 200 if the light permits, but meter the actual scene and check your camera's sync limit. These are teaching numbers, not universal settings.
Turn on TTL flash with FEC at zero. Place the subject at a repeatable distance. Take a photograph, then make one at -1 stop and one at +1 stop without changing your composition. Compare the face or primary subject, not the entire frame's average brightness. The right image may be between those settings. Many systems allow smaller increments. Keep a note of whether the flash was direct, bounced, or modified because the quality of light matters as much as the quantity.
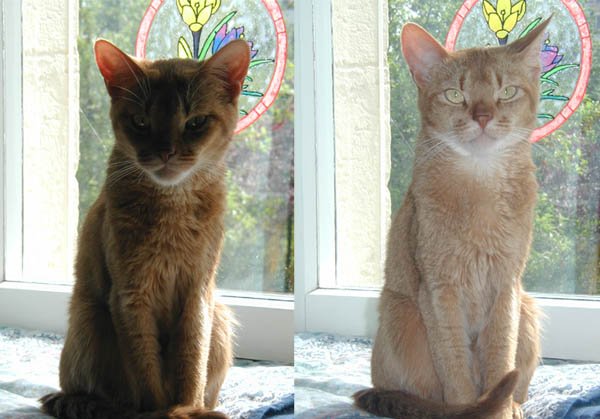
The fill-flash comparison is a reminder to judge the face and surrounding light separately. A successful fill exposure often looks like good available light rather than an obvious blast from the camera.
What one stop of FEC means
At +1 stop, the system aims for twice the flash exposure it would have delivered at zero, within the flash's available power. At -1 stop, it aims for half. This does not mean every pixel becomes twice or half as bright: ambient light is still present, and the final pixel receives a combination. A face already lit by strong daylight may change less visibly than a face in deep shade.
Positive FEC is useful when the flash meter underestimates a dark subject or when a brighter treatment is intentional. Negative FEC often helps when a light-colored face, reflective object, or direct flash looks too strong. Do not memorize a fixed negative value for every portrait. TTL metering patterns, bounce surfaces, modifier losses, skin and clothing tones, and framing change the result. Starting at zero and learning the local bias is more reliable than treating -1 as a magic setting.
If the flash reaches full output, asking for more FEC cannot create power that is not available. The unit may indicate underexposure or take longer to recycle. Move it closer, use a wider aperture or higher ISO, choose a more efficient bounce surface, or accept less flash contribution. Do not silently raise shutter speed above normal sync and expect the same result unless your system is configured for high-speed sync.
Ambient exposure compensation is not the same dial
In aperture priority or another automatic exposure mode, ordinary exposure compensation can change the camera's ambient exposure. Depending on the camera and its settings, it may also affect the flash metering target. Nikon specifically documents that the relationship varies across models and custom settings. Some systems treat the controls separately; others can make an overall compensation influence flash as well. The fastest way to learn your setup is a three-frame test with a fixed subject and a stable background.
First shoot both controls at zero. Then change only ordinary exposure compensation by one stop. Compare background and subject. Reset it, change only FEC by one stop, and compare again. If the background moves with FEC, an automatic shutter or ISO decision may be changing between frames. Set manual camera exposure and fixed ISO, then retest. If the flash effect differs from your expectation, consult the model's manual for exposure-compensation interaction.
The EXIF viewer can help you compare shutter speed, aperture, and ISO in original files. Flash-related metadata varies by format, camera, and export software, so do not assume a shared JPEG records every TTL or FEC detail. Write the FEC setting next to your test sequence. For a deeper explanation of the camera meter, read our metering modes guide.
Adorama's short demonstration by David Bergman shows why a small FEC correction changes the subject's appearance while you keep the rest of the exposure under control.
Fill flash outdoors without the flash look
In backlit daylight, meter the background first. If the sky is important, keep its bright areas from clipping; if the background is a softly lit street or garden, a slightly brighter exposure may feel more natural. Add TTL flash at zero and check the face. If it competes with the sunlight or casts an obvious hard shadow, reduce FEC and change the light's direction or size. If the eyes and skin remain too dark, add a little FEC or move the light closer.
The goal of fill is often to reduce the contrast between subject and background, not erase every shadow. A close direct flash produces a different look from a larger off-camera source. A bright sunny background may demand more flash output than a small speedlight can provide at the chosen aperture. In that case, move to open shade, choose a different time, or embrace a silhouette. A meter correction cannot overcome a hard physical limit.
Watch for catchlights and color differences. Flash may be cooler than warm sunset light. Auto white balance may shift between frames when the flash dominates. Shoot RAW if possible, set a consistent white balance for a comparison series, and decide whether the mixed color is acceptable. Our natural-light portrait guide is a useful companion when you want to work without a flash at all.
Bounce flash indoors
A white ceiling or wall can turn a small flash into a broader apparent source. Pointing the head away from the subject changes both direction and efficiency. A high, dark, colored, or distant ceiling may absorb so much light that the flash struggles. TTL often compensates automatically, but only until it runs out of power. A green wall can also tint a face even when the overall exposure is correct.
Make a baseline frame with the flash bounced, then adjust FEC by small increments if the face is too dark or bright. Before applying a large positive correction, look for a better bounce direction and a closer surface. The angle of light controls shadows; FEC controls how much of that light the system attempts to deliver. A photograph can be correctly exposed but unflattering because the light comes from the wrong direction.
Keep the subject away from a wall if you want shadows to fall out of view. Rotate or move the flash head when switching between horizontal and vertical framing so the bounce still goes where you expect. Recheck after each substantial position change. TTL reacts to distance and reflectivity, but it cannot know your intent for a natural, dramatic, or evenly lit portrait.

This comparison illustrates a separate decision from compensation: where light comes from. When adjusting a portrait, change the light direction before trying to solve a harsh shadow with a brighter or darker flash setting.
Off-camera TTL and multiple groups
With a compatible wireless trigger, FEC may be applied globally or to individual TTL groups, depending on the system. Read the trigger display carefully. If one group lights the face and another lights the background, a global correction can disturb both. A group-specific adjustment is more precise. For a stable subject and fixed light positions, manual group power may be easier to repeat across a long series.
An off-camera light's distance and modifier alter the actual illumination. If a person walks toward a stationary flash, the light can change dramatically. TTL may partly adapt, but the preflash measures a different scene each time and reflective clothing can affect it. Make a new reference frame when distance, modifier, bounce direction, or background changes. Our off-camera flash portrait guide covers the placement and trigger decisions.
Avoid buying equipment to solve a metering misunderstanding. Practice with one compatible flash before adding multiple groups. If you are shopping for a TTL camera flash or wireless TTL trigger, confirm the exact camera mount, firmware support, and wireless system before ordering. The name TTL alone does not guarantee interoperability.
Diagnose five common failures
| Result | Likely first check | Better next move |
|---|---|---|
| Subject bright, background right | FEC or direct flash is too strong | Reduce FEC, then improve direction |
| Subject dark, background right | Insufficient flash or negative FEC | Raise FEC modestly; check power limit and distance |
| Both subject and background dark | Ambient camera exposure | Correct shutter, aperture, or ISO baseline first |
| Frame varies as you recompose | TTL preflash sees a different mix of tones | Keep framing consistent or use manual flash power |
| Flash appears inconsistent in bursts | Unit has not fully recycled | Slow down and monitor ready indication |
Beware of a white shirt, mirror, or bright wall dominating the metering area. It can make TTL reduce output, leaving a nearby face dark. Spotting this pattern is more useful than repeatedly increasing compensation without understanding why. Likewise, a subject against a black background may receive more light than you expected. Fill the frame consistently during tests and review the actual subject.
If only part of the frame is dark, check sync compatibility. A shutter speed beyond normal sync without high-speed sync can produce a shutter-band artifact, not merely an underexposed portrait. Electronic shutter modes on some cameras impose additional flash restrictions. Your camera manual is the authority for the supported combination.
A repeatable ten-minute exercise
Set up one person or an inanimate stand-in next to a window. Keep the camera and subject fixed. Photograph ambient only, then TTL at zero, -1, and +1 FEC. Choose the best subject exposure and note why. Next, change the background exposure by one stop while keeping your flash method otherwise consistent. Finally, bounce the flash from a neutral surface and repeat the three FEC frames.
This gives you a small contact sheet that separates four variables: ambient level, flash quantity, flash direction, and camera behavior. If your camera changes ISO automatically, redo the exercise with fixed ISO. If your results change dramatically when you reframe, you have seen the normal sensitivity of TTL to metering context. Do not judge a system by a single frame.
Use the best pair of frames as a reference for your next shoot. You may discover that a small negative FEC gives the understated fill you prefer indoors, while backlit outdoors requires more output. Those are local preferences, not universal prescriptions. Keep the ambient and subject decisions separate, and adjustments become fast and predictable.
Frequently asked questions
Does FEC work in manual camera mode?
Yes, if the flash itself remains in a compatible TTL mode. Manual camera exposure fixes your ambient settings, while the TTL system still calculates flash output. If the flash is set to manual power, change its power instead.
Is FEC the same as changing flash power?
Both influence light from the flash, but FEC biases an automatic calculation. Manual power requests a fixed output level. TTL with FEC can still change output between frames as subject distance and composition change.
Why does plus one FEC barely change my picture?
The subject may already receive substantial ambient light, the flash may be at full output, or an automatic exposure variable may have changed at the same time. Compare fixed-exposure frames of a subject primarily lit by flash and check the ready or underexposure indication.
Should I leave FEC at a negative setting all the time?
No. A subtle fill preference can justify a small negative bias in a particular setup, but reset or reconsider it when the scene changes. Nikon's manual explicitly notes that flash compensation may persist when the camera is turned off, so make a settings check part of your next session.