How to Photograph Lightning: Complete Guide
As an Amazon Associate, ExifGrabber earns from qualifying purchases.
The Thrill of Lightning Photography
Few subjects in nature photography deliver as much visual impact as a well-captured lightning bolt. A single frame can convey the raw power of a thunderstorm in a way that no video or written description ever will. The good news is that you don't need exotic gear or decades of experience to get stunning lightning shots. You need a camera with manual controls, a sturdy tripod, patience, and respect for the weather.
This guide covers everything from camera settings and essential equipment to safety protocols and post-processing. Whether you're photographing your first summer storm from a covered porch or chasing supercells across open plains, these techniques will help you bring home dramatic images.

Equipment You Need
Camera
Any camera with full manual exposure control works for lightning photography. DSLRs and mirrorless cameras are ideal because they give you direct control over aperture, shutter speed, ISO, and focus mode. Some advanced compact cameras with manual modes can work too, but you'll want a camera that can handle exposures of 10 to 30 seconds without excessive noise.
Tripod
A tripod is non-negotiable. You're shooting exposures measured in seconds, so any camera movement will ruin the shot. Choose a tripod that's heavy or stable enough to resist wind gusts. Storm winds are common around thunderstorms, and a lightweight travel tripod can vibrate or topple in gusts. If you're using a lighter tripod, hang your camera bag from the center column hook to add ballast. Our guide to the best tripods for travel photography covers sturdy options at every budget.
Lenses
A wide-angle lens in the 14mm to 35mm range is your best bet. Wider fields of view capture more sky, which dramatically increases your odds of catching a bolt within the frame. You can't predict exactly where lightning will strike, so wider is almost always better.
That said, if you're photographing a storm that's producing frequent strikes in a concentrated area, a moderate focal length (50mm to 70mm) can isolate individual bolts for a more dramatic composition.
Remote Shutter Release or Intervalometer
Touching the camera to press the shutter introduces vibration. A remote shutter release or intervalometer lets you trigger exposures without contact. An intervalometer is particularly useful because you can set it to fire continuous exposures back-to-back, automating the capture process. Set a 15 to 30-second exposure, zero-second interval, and unlimited shot count, then let the camera keep shooting while you watch the storm.
Many modern cameras have built-in intervalometer features or smartphone apps that provide the same functionality.
Lightning Trigger (Optional but Powerful)
A lightning trigger is a sensor that detects the flash of a lightning strike and fires your camera's shutter within milliseconds. This is especially useful for daytime lightning photography, where you can't use long exposures because the ambient light would blow out the image.
The MIOPS Smart+ Camera Trigger is the most popular option, priced around $259 to $329. It offers lightning detection, sound triggering, laser triggering, and timelapse modes in one device. It mounts to your camera's hot shoe and connects via a cable release. A smartphone app lets you adjust sensitivity and triggering modes wirelessly.
The advantage of a trigger over manual long exposures is precision. During the day, you can't leave the shutter open for 20 seconds without overexposing the sky. A trigger fires in response to the lightning itself, capturing the bolt with a fast shutter speed (1/200s or faster) and proper exposure.
Neutral Density Filter (For Daytime Shooting)
If you want to shoot long exposures during the day without a lightning trigger, a strong ND filter (6 to 10 stops) can darken the scene enough to allow multi-second exposures. Check out our ND filter guide for recommendations.
Camera Settings for Nighttime Lightning
Nighttime storms are the easiest starting point for lightning photography because darkness allows long exposures that capture multiple bolts per frame. Here are the settings to start with:
Aperture: f/8 to f/11
A mid-range aperture gives you sharp results across the frame while controlling the brightness of the lightning bolt. If the strikes are very close and bright, stop down to f/11 or f/13 to prevent blowing out the highlights. For distant storms, open up to f/5.6 or f/8 to capture fainter bolts.
ISO: 100
Keep ISO at its base value (usually 100 or 64, depending on your camera). This minimizes noise during long exposures and gives you the most dynamic range to work with in post-processing. If the lightning is very distant and faint, you can bump ISO to 200 or 400, but higher ISOs introduce noise that becomes visible in the dark sky areas.
Shutter Speed: 10 to 30 Seconds
This is the creative variable. A longer exposure increases your chance of catching a strike during the frame. Start with 20 seconds. If you're capturing too many bolts per frame (they can overlap and create a messy image), shorten to 10 to 15 seconds. If bolts are infrequent, extend to 25 or 30 seconds.
Some cameras allow exposures beyond 30 seconds using Bulb mode. With a locking cable release, you can hold the shutter open for a minute or more during lulls between strikes.
Focus: Manual, Set to Infinity
Autofocus will hunt endlessly in the dark. Switch your lens to manual focus and set it to infinity. The most reliable method is to autofocus on a distant light (a streetlight, the moon, or a lit building) before the storm arrives, then switch to manual focus without touching the focus ring. If your lens has a focus distance window, verify it reads infinity (the sideways 8 symbol).
Some newer mirrorless cameras allow you to magnify the live view even in darkness. If you can see a distant object, magnify to 10x and fine-tune manual focus on that object.
White Balance: Auto or Daylight
Set white balance to Auto or Daylight. Lightning tends to be cool-toned (blue-white), and daylight white balance preserves that natural look. You can always adjust white balance in post if you shoot in RAW, which you should.
Shoot RAW
Always shoot in RAW format for lightning. RAW files give you full latitude to recover blown highlights in the brightest part of the bolt while pulling detail from the dark sky. JPEG compression bakes in exposure decisions that you can't undo later. Use ExifGrabber to check your RAW files' metadata and verify your settings between attempts.
Camera Settings for Daytime Lightning
Daytime lightning is significantly harder because you can't leave the shutter open without overexposing the sky. You have two approaches:
Method 1: Lightning Trigger
With a trigger like the MIOPS Smart+, use settings similar to normal daylight photography:
- Aperture: f/8 to f/11
- ISO: 100
- Shutter speed: 1/200s to 1/500s (fast enough to freeze the bolt)
- Focus: Manual, set on the storm
The trigger does the timing for you. You just need to point the camera at the active part of the storm and let the sensor detect the flash.
Method 2: ND Filter with Long Exposure
Stack a 6 to 10-stop ND filter to darken the scene enough for a multi-second exposure. For example, if a proper daylight exposure is 1/250s at f/11 and ISO 100, a 10-stop ND filter lets you shoot at 4 seconds with the same aperture and ISO.
The tradeoff is image quality. Strong ND filters can introduce color casts, and very long daytime exposures may blur moving clouds (which can look artistic or distracting, depending on taste).
Composition Tips
Include Foreground Interest
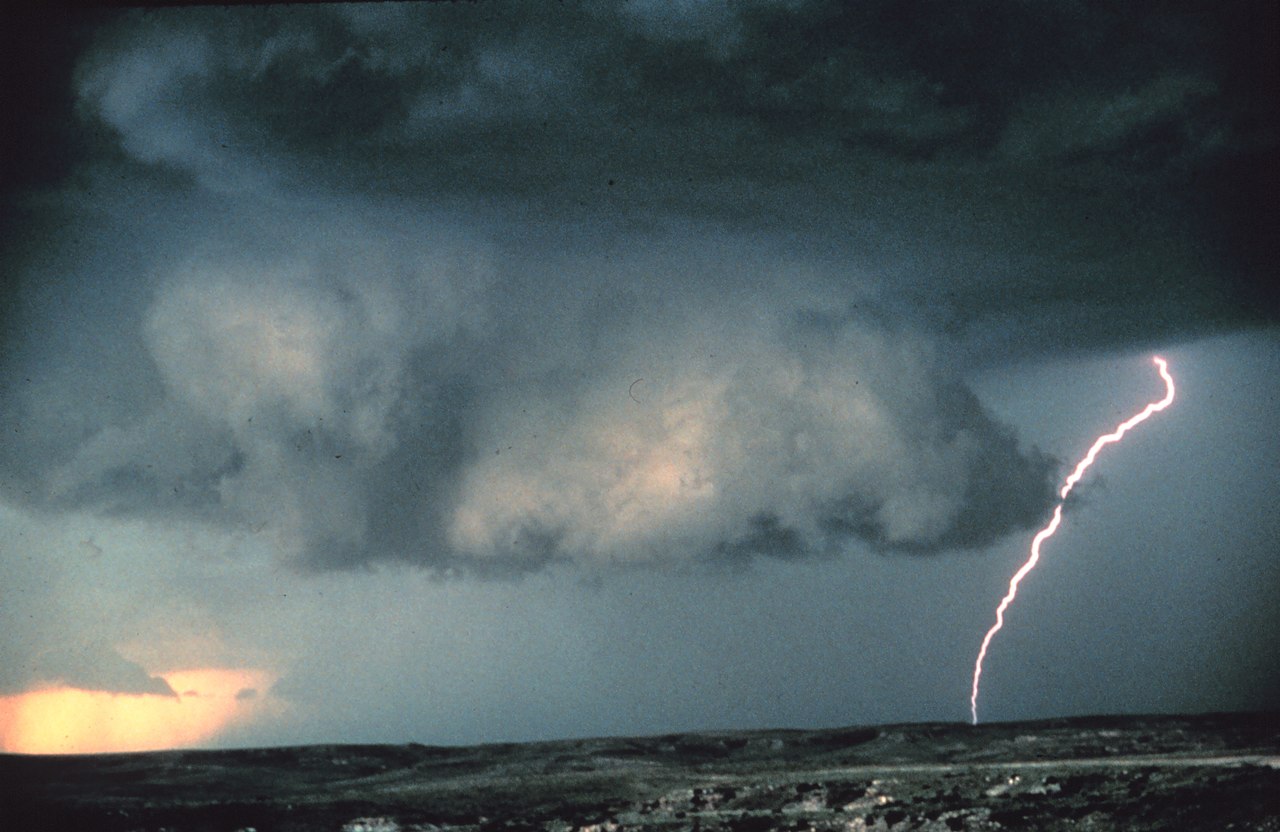
A lightning bolt against a plain sky is impressive for about 5 seconds. What makes a lightning photograph truly compelling is context: a bolt arcing over a city skyline, striking behind a lone tree, or illuminating a desert landscape. Look for strong foreground elements that ground the image and give the viewer a sense of scale.
Use the Rule of Thirds
Place the horizon in the lower third if the sky action is the star. If you have a dramatic foreground (a lake reflecting the storm, a silhouetted mountain range), drop the horizon to the lower third and let the sky dominate. Our guide on leading lines covers compositional techniques that work well in storm photography.
Shoot Both Horizontal and Vertical
Horizontal frames capture wide storm systems and multiple bolts. Vertical frames isolate single dramatic bolts from cloud to ground. Shoot both orientations and decide later which works best for each strike.
Watch the Edges
With wide-angle lenses, it's easy to clip bolts at the frame edge. If you're seeing strikes primarily on one side of your frame, recompose to center the action. You can always crop later, but you can't add sky that wasn't in the original capture.
Safety: The Non-Negotiable Part
Lightning kills roughly 20 people per year in the United States alone and injures hundreds more. No photograph is worth a hospital visit or worse. Take safety seriously.
The 30/30 Rule
If the time between a lightning flash and the thunder is 30 seconds or less, the storm is within 6 miles, which is within striking distance. Seek shelter. Wait at least 30 minutes after the last thunder before returning to exposed areas.
Best Shooting Positions
Indoors (safest): Photograph through a window or glass door. Modern glass won't affect image quality in any meaningful way, and you're fully protected. Use a lens hood to reduce reflections, or press the lens hood directly against the glass.
Covered structures: A covered patio, parking garage, or car (with windows up) offers good protection while allowing a clear view of the sky. Your car's metal frame acts as a Faraday cage, directing lightning around you rather than through you.
Elevated terrain: Hilltops, ridgelines, and open fields are the most dangerous locations during a thunderstorm. If you're caught in the open, crouch low with your feet together. Do not lie flat.
Equipment Safety
Remove metal tripods from open areas when not actively shooting. A tripod on a hilltop is essentially a lightning rod. If you must shoot from exposed positions, use a wireless remote so you can stand well away from the tripod and camera.
Storm Direction
Thunderstorms typically move from west to east (in the Northern Hemisphere). Position yourself so the storm approaches from across your field of view rather than directly overhead. This gives you time to observe the lightning pattern, compose your shot, and retreat if the storm closes in.
Post-Processing Lightning Photos
Basic Adjustments
Start with white balance. Lightning often produces a cool blue-white light against a warm ambient sky. Adjust white balance to taste, but many photographers prefer to keep the lightning cool and let the sky show natural storm colors (purples, greens, and oranges).
Pull the highlights slider down to recover detail in the brightest part of the bolt. Push shadows up slightly to reveal landscape detail. Add clarity or texture to enhance the bolt's edges and the cloud structure.
Stacking Multiple Frames
If you captured multiple single-bolt frames from the same position, you can combine them in Photoshop using "Lighten" blend mode. Stack the images as layers, set each layer to Lighten, and the software composites only the brightest pixels from each frame. The result is a single image showing multiple bolts as if they all struck during one exposure.
This technique works best when the camera hasn't moved between frames (tripod is essential) and the ambient light hasn't changed dramatically between shots.
Noise Reduction
Long exposures in warm conditions can produce hot pixels and thermal noise. Use your editing software's noise reduction on the dark sky areas, but be careful not to smooth the lightning bolt itself. Luminance noise reduction in Lightroom works well when applied with masking so it affects only the sky.
Timing and Location
Storm Forecasting
Check weather radar apps before heading out. In the US, the Storm Prediction Center (spc.noaa.gov) issues outlooks for severe weather risk areas. Even basic weather apps show approaching storm cells on radar, which helps you position yourself ahead of the action.
The best lightning photography often comes from isolated supercell thunderstorms, which produce frequent, powerful cloud-to-ground bolts. Squall lines and broad frontal systems produce lightning too, but the bolts are often obscured by rain.
Best Times of Year
In the United States, peak lightning season runs from June through August, with the highest frequency in Florida, the Gulf Coast, and the central Plains states. The Desert Southwest (Arizona, New Mexico) sees dramatic monsoon storms in July and August that produce spectacular lightning against open desert landscapes.
Golden Hour Storms
Some of the most dramatic lightning photographs happen when a storm arrives near sunset. The low sun illuminates the storm's anvil top from the side or below, creating vivid orange and pink clouds as a backdrop for lightning bolts. If you see a storm building to the east during golden hour, position yourself to the west with the setting sun behind you.

Quick Reference: Settings Cheat Sheet
| Scenario | Aperture | ISO | Shutter Speed | Focus |
|---|---|---|---|---|
| Nighttime, close storm | f/8 to f/11 | 100 | 10-15s | Manual, infinity |
| Nighttime, distant storm | f/5.6 to f/8 | 100-200 | 20-30s | Manual, infinity |
| Daytime with trigger | f/8 to f/11 | 100 | 1/200-1/500s | Manual, storm |
| Daytime with ND filter | f/8 to f/11 | 100 | 2-8s | Manual, infinity |
Common Mistakes and How to Fix Them
Overexposed bolts: The lightning bolt is a white blob with no internal detail. Solution: Stop down your aperture (go from f/5.6 to f/8 or f/11) or reduce exposure time.
Bolts outside the frame: You're aimed at the wrong part of the storm. Solution: Go wider with your lens and watch where strikes are clustering before committing to a composition.
Soft images: Focus drifted or was never set correctly. Solution: Double-check manual focus on a distant object. Turn off image stabilization when on a tripod, as it can introduce micro-vibrations during long exposures.
Too much noise: ISO is too high or the exposure is too long in warm conditions. Solution: Keep ISO at 100. If noise is still a problem, enable your camera's long exposure noise reduction (it takes a second dark frame to subtract thermal noise, though it doubles your capture time).
Rain on the lens: Shooting through rain produces soft, smeary images. Solution: Use a rain cover or lens hood, and keep a microfiber cloth handy. Our guide to camera cleaning kits covers waterproofing accessories.
Start Simple
Your first lightning photography session doesn't need to be a storm-chasing expedition. Wait for the next summer thunderstorm to roll through your area. Set up your camera on a tripod inside your house, pointing through a window. Use the settings from the nighttime cheat sheet above. Fire continuous 20-second exposures with an intervalometer and let the camera work while you watch the show.
Once you've captured your first bolt, check the EXIF data with ExifGrabber to review what settings produced your best result, then refine from there. Lightning photography is as much about patience and persistence as it is about technique. The more storms you shoot, the better your instincts become for reading the sky and anticipating where the next strike will land.