How to Photograph the Moon: Settings, Gear, and Composition Guide
As an Amazon Associate, ExifGrabber earns from qualifying purchases.
Why the Moon Is Harder to Photograph Than You Think
The moon looks enormous and luminous to the naked eye, but point a camera at it and you'll usually get one of two results: a blown-out white blob against a black sky, or a tiny speck that barely registers. The problem is twofold. First, your camera's meter sees all that surrounding darkness and overexposes the moon itself. Second, the moon is physically much smaller in the frame than your brain suggests, especially on shorter focal lengths.
The good news is that once you understand the handful of variables at play, moon photography becomes remarkably repeatable. The same settings that work tonight will work next month, next year, and from almost any location on Earth. This guide walks through everything from gear selection to post-processing, whether you're shooting a detailed close-up of the lunar surface or composing the moon into a landscape scene.
Essential Gear for Moon Photography
Camera Body
Any camera with full manual exposure control will work. You don't need a full-frame sensor or the latest autofocus system. APS-C and Micro Four Thirds cameras actually have an advantage here because their crop factor gives you extra reach. A 300mm lens on an APS-C body delivers the equivalent field of view of 450mm, which means more moon in your frame without buying a longer lens.
That said, a camera with good high-ISO performance helps for crescent and eclipse phases where the light is lower. If you're shopping, bodies like the Nikon Z50 II or Canon EOS R7 offer excellent resolution and reach at reasonable prices.
Lenses
The lens matters more than the body for moon photography. You need focal length, and plenty of it. Here's what to expect at different lengths:
| Focal Length | Moon Size in Frame | Best For |
|---|---|---|
| 50mm | Tiny dot | Moon in landscape, wide compositions |
| 200mm | Small circle, some surface detail | Moonrise scenes |
| 400mm | Moderate, clear maria visible | Detailed surface shots on APS-C |
| 600mm+ | Large, craters clearly resolved | Dedicated lunar close-ups |
A Sigma 150-600mm f/5-6.3 DG DN OS Sports is one of the most popular choices for moon work because it offers massive reach in a single zoom. For a more budget-friendly option, the Tamron 70-300mm f/4.5-6.3 Di III RXD gets you into usable territory, especially on a crop-sensor body.
You don't need a fast aperture. The moon is a sunlit object, so f/5.6 or f/8 is perfectly fine. In fact, most lenses perform best around f/8 to f/11, which is exactly the range you'll be shooting in.
Tripod and Remote Release
At 300mm and beyond, even minor vibrations will blur your shot. A sturdy tripod is non-negotiable. Pair it with a remote shutter release or use your camera's 2-second self-timer to eliminate the vibration from pressing the shutter button.
If your camera or lens has image stabilization, turn it off when mounted on a tripod. The stabilization system can actually introduce micro-vibrations when there's no real movement to correct.
Camera Settings for the Moon
The Looney 11 Rule
Experienced lunar photographers use a rule of thumb called the "Looney 11 Rule" as a starting point. It works because the moon is essentially a sunlit rock, reflecting direct sunlight:
Set your aperture to f/11, your ISO to 100, and your shutter speed to 1/100s. That's it. From there, adjust based on what you see on the LCD.
This rule works best for a full moon. For other phases, you'll need to open up since less of the surface is illuminated:
| Moon Phase | Suggested Starting Settings |
|---|---|
| Full Moon | f/11, ISO 100, 1/125s |
| Gibbous (3/4) | f/11, ISO 100, 1/60s |
| Quarter Moon | f/8, ISO 200, 1/60s |
| Crescent | f/5.6, ISO 400, 1/60s |
| Lunar Eclipse (partial) | f/5.6, ISO 800, 1/15s |
| Lunar Eclipse (total) | f/4, ISO 1600, 1s-4s |
Metering and Exposure
Your camera's evaluative or matrix metering will be fooled by the vast expanse of dark sky. Switch to spot metering and place the metering point directly on the moon's surface. This tells the camera to expose for the bright subject rather than the dark surroundings.
Alternatively, shoot in full manual mode using the Looney 11 starting points above and adjust by chimping the histogram. You want the bright lunar surface data sitting in the right third of the histogram without clipping.
Focus
Autofocus can struggle in the dark. If your lens hunts back and forth, switch to manual focus. Use live view zoomed to 10x on the moon's surface and turn the focus ring until the crater edges look razor-sharp. Once you've nailed focus, don't touch the ring again. Some photographers tape it in place.
If your camera has focus peaking, enable it. The bright outlines around the crater rims will confirm you're dialed in.
File Format
Always shoot RAW. The moon has surprisingly subtle tonal gradations in its surface, from the bright highlands to the darker maria. RAW gives you the latitude to pull out those details in post-processing without introducing banding or noise artifacts.
You can check what settings were used in any moon photo by dropping the RAW file into ExifGrabber to inspect the EXIF data, including focal length, aperture, ISO, and shutter speed.
Composition Ideas Beyond the Close-Up
A tight crop of the lunar surface is satisfying, but the moon offers much more compositional potential when you think beyond the standard centered circle.
Moonrise and Moonset
The moon near the horizon looks largest to the human eye (the famous "moon illusion") and sits against foreground elements like buildings, trees, and mountains. Use apps like PhotoPills or The Photographer's Ephemeris to predict exactly when and where the moon will rise or set relative to your location. You can plan a shot where the moon rises directly behind a landmark weeks in advance. For more on planning tools, see our guide on how to use PhotoPills for golden hour planning.
For moonrise compositions, use a longer lens (200mm+) from a distance. Compression makes the moon appear larger relative to your foreground subject. If you stand a mile away from a building and shoot at 400mm, the moon behind it will look enormous.
Moon Trails
Just as you can capture star trails with long exposures, the moon traces a bright arc across the sky. Use an intervalometer to shoot a series of exposures over 30 to 60 minutes, then stack them in software. The result is a luminous streak showing the moon's path. Check out our star trails guide for the stacking technique, which is identical.
Earthshine on the Crescent Moon
During a thin crescent phase, the dark portion of the moon is faintly lit by light reflected off the Earth. This ghostly glow is called earthshine, and capturing it requires exposing for the dim portion while accepting that the bright crescent will blow out. Bracket your exposures and blend them in post for a result that shows both the crisp crescent and the soft earthshine detail.

Shooting Different Moon Phases
Each phase presents different challenges and rewards.
Full Moon
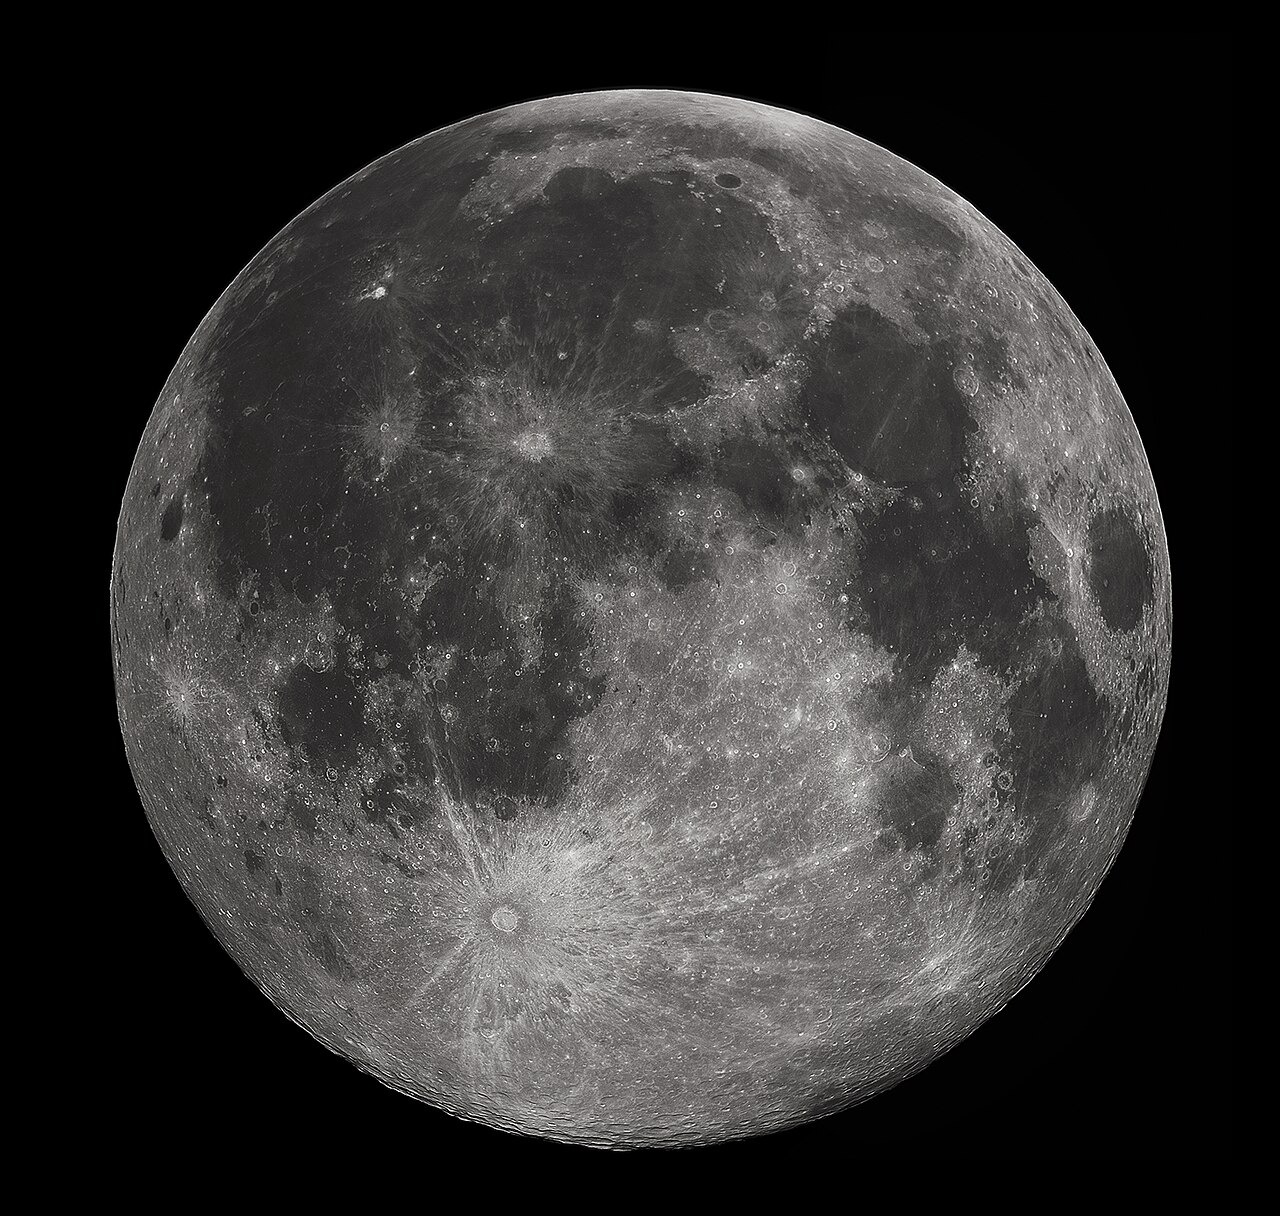
The full moon is the brightest and easiest to expose, but it's also the flattest photographically. With the sun directly behind you illuminating the entire visible surface head-on, there are minimal shadows to give the craters three-dimensional depth. The surface looks somewhat washed out and less textured.
Still, a full moon is the classic subject, and it's the best phase for moonrise or moonset compositions where you want a big bright disc behind a foreground element.
Quarter and Gibbous Phases
These are the most rewarding phases for surface detail. The terminator, the line between the lit and dark sides, creates long shadows that reveal the topography of craters, ridges, and mountain ranges in dramatic relief. If your goal is a detailed lunar close-up, shoot during a quarter or gibbous phase.
Crescent
A thin crescent is the most atmospheric phase. It pairs beautifully with twilight skies when Venus or Jupiter is nearby. Exposure is trickier because the lit portion is small. Use spot metering on the crescent itself, then consider a second exposure for the earthshine.
Lunar Eclipse
A total lunar eclipse turns the moon a deep red-orange (the "blood moon") and dramatically reduces its brightness. You'll need to open up your exposure significantly compared to a normal full moon. Expect to shoot at ISO 800 to 3200 with shutter speeds around 1 to 4 seconds. A tracking mount helps at these longer exposures, but you can get away without one if you keep exposures under 2 seconds at moderate focal lengths.
For more on tracking mounts, see our polar alignment guide.
Post-Processing Moon Photos
Basic Adjustments
Import your RAW file into Lightroom, Capture One, or your preferred editor. Start by:
- Setting the white balance to daylight (around 5500K). The moon is reflecting sunlight, so daylight white balance is accurate.
- Pulling the highlights slider down to recover any blown-out areas on the brightest portions of the surface.
- Pushing clarity or texture up moderately (around +20 to +40) to enhance the surface detail without making it look over-processed.
- Adding a gentle curves adjustment to deepen the blacks of the surrounding sky.
Sharpening
The moon rewards careful sharpening. In Lightroom, zoom to 100% and use the Detail panel. Start with Amount around 80, Radius at 1.0, and Detail at 50. Use the masking slider (hold Alt/Option while dragging) to restrict sharpening to the lunar surface edges and prevent the sky from getting noisy.
Stacking for Detail
If you want to push the detail further, capture 50 to 100 frames in quick succession and stack them using free software like RegiStax or AutoStakkert. Stacking averages out atmospheric turbulence and noise, producing a result far sharper than any single frame. This is the same technique planetary photographers use to capture stunning images of Jupiter and Saturn. See our Saturn photography guide for more on this workflow.
Common Mistakes and How to Fix Them
The moon is a white blob with no detail. You're overexposing. Switch to spot metering on the moon or use the Looney 11 Rule as your starting point. Check the histogram and make sure the highlights aren't clipped.
The moon is tiny in the frame. You need more focal length. At 50mm, the moon is genuinely tiny. Shoot at 300mm or longer, or crop aggressively in post. A crop-sensor body helps here.
The moon is blurry despite using a tripod. Three likely causes: you're touching the camera when firing the shutter (use a remote or self-timer), atmospheric turbulence is bad (wait for a calmer night or shoot when the moon is higher), or image stabilization is introducing micro-shake on the tripod (turn it off).
The sky is noisy but the moon is fine. Normal. The sky is underexposed relative to the moon. In post, select the sky area and apply noise reduction independently, or simply crop tighter to minimize visible sky.
Colors look wrong. Set your white balance to daylight (5500K). Auto white balance can produce odd tints under artificial light or at twilight.
Recommended Gear List
Here's a practical kit for getting started with moon photography:
| Item | Budget Option | Upgrade Pick |
|---|---|---|
| Camera | Canon EOS R50 | Nikon Z6 III |
| Lens | Tamron 70-300mm Di III RXD | Sigma 150-600mm DG DN OS Sports |
| Tripod | K&F Concept Travel Tripod | Benro Mach3 Carbon Fiber |
| Remote | Wireless shutter remote | Camera's built-in app |
Putting It All Together
Moon photography is one of the most accessible entry points to astrophotography. You don't need a star tracker, you don't need to drive to a dark sky site, and you don't need an expensive fast lens. A telephoto lens, a tripod, and the Looney 11 Rule will get you a detailed lunar surface shot on your very first attempt.
Start with a quarter moon for the most dramatic surface detail. Set your camera to manual mode, dial in f/11, ISO 100, and 1/100s. Use spot metering, shoot RAW, and focus manually at 10x live view magnification. Take 20 to 30 frames, pick the sharpest one, and process it with a bump in clarity and careful sharpening. You'll be surprised how much crater detail a modest telephoto can resolve on a steady night.
Once you're comfortable with the basics, experiment with composition. Shoot the moonrise behind a city skyline at 400mm. Capture the earthshine on a crescent. Stack 100 frames for a super-resolution close-up. The moon is always there, always changing phase, and always worth photographing.
For deeper dives into night sky photography, explore our beginner's guide to astrophotography and best lenses for Milky Way photography.