Lightroom Assisted Culling Guide 2026: Select Photos Faster
What Lightroom Assisted Culling actually does
As an Amazon Associate, ExifGrabber earns from qualifying purchases.
Lightroom Assisted Culling analyzes a group of photos and suggests which frames deserve a closer look. It can identify subject sharpness, eye sharpness, open eyes, exposure problems, accidental captures, documents, and receipts. It can also group similar cloud photos into stacks and recommend a cover image. Adobe moved the feature into general availability in June 2026 after refining it with photographer feedback.
The important word is assisted. Lightroom is not choosing your portfolio, understanding a client's priorities, or recognizing the one imperfect frame with the strongest expression. It is completing a technical first pass. You still make the creative decision.
This division of labor is useful after weddings, portraits, sports, wildlife sessions, and events where hundreds of near-duplicates slow the edit. Let Lightroom surface likely keepers and obvious misses, then verify the results in context. The best workflow saves time without handing taste to an algorithm.
Assisted Culling is documented for Lightroom on desktop, including cloud albums and supported local folders. Do not assume every Lightroom Classic panel has the same controls. Adobe's Lightroom and Lightroom Classic products overlap, but their organization tools and release timing are not identical.
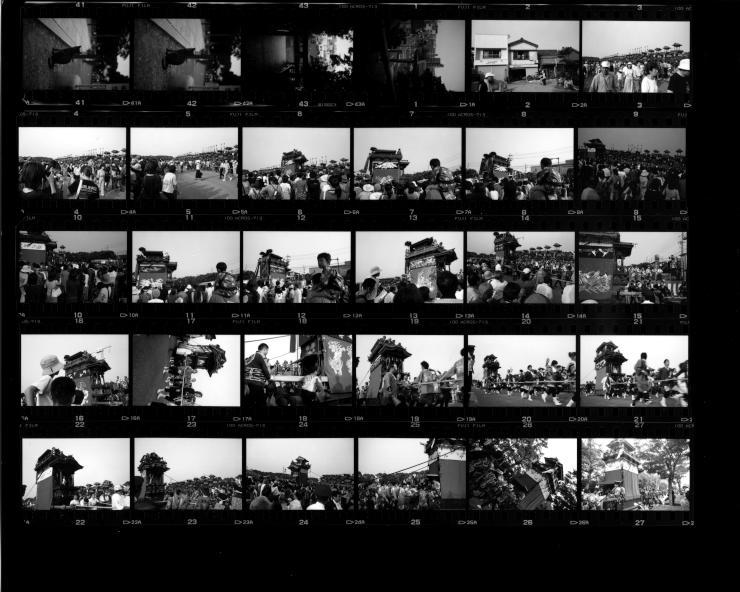
Why culling is harder than it looks
A photographer rarely rejects an image for only one reason. A frame may be sharp but unflattering, technically clean but repetitive, or slightly soft yet emotionally stronger than the frames around it. A useful culling system separates four questions:
- Is the file technically usable? Check focus, exposure, motion, and accidental captures.
- Is it the strongest frame in its sequence? Compare expression, gesture, timing, and background.
- Does it add something different? Remove near-duplicates that do not change the story.
- Does it belong in the final delivery? Apply the brief, audience, and intended output.
Assisted Culling is strongest at the first question and helpful with the second and third. Only the photographer can answer the fourth. That boundary should shape every setting you choose.
Prepare the album before you ask Lightroom to judge it
Start with a complete, backed-up import. Keep all files from one assignment together and remove unrelated phone screenshots, exports, or scans if they do not belong in the review. Mixed content can make the reject categories less useful.
Check capture time before sorting a multi-camera job. If two cameras were not synchronized, fix the time offset first so sequences appear in the order they happened. You can inspect a representative file with the EXIF viewer to confirm capture time, camera model, shutter speed, aperture, ISO, and focal length. Metadata will not choose a winner, but it explains why one sequence behaved differently from another.
Build previews and let cloud files finish syncing before a deadline session. Assisted analysis needs access to the photos, and a partially synced album creates an incomplete review. If you are working from Local folders, confirm that the source drive remains connected until analysis and any batch actions are finished.
Make a temporary duplicate album or preserve an untouched source collection if the job is critical. Flags, ratings, labels, and album membership are reversible. Permanent deletion is not the right first action when you are still learning how the feature responds to your work.
Run a conservative first pass
Open the album, choose Assisted Culling, and start with Cull. Lightroom begins analysis when you enable criteria in the Select or Reject sections. A conservative setup should find obvious technical wins without excluding ambiguous frames too early.
For people, enable Subject Sharpness and Eye Sharpness, but avoid pushing both thresholds to their strictest values. Add Eyes Open when closed eyes are never acceptable, such as a formal group portrait. In candid coverage, a blink can occur during laughter, a kiss, a prayer, or a transition that still matters to the story. Use the option that includes uncertain detections if excluding a person would be costly.
For wildlife or sports, Subject Sharpness is usually more useful than face-related criteria. Motion blur may be deliberate in a panning frame, so review anything the system marks as soft before rejecting it. For landscapes and architecture, Assisted Culling has less semantic context. Exposure flags and accidental-capture detection can help, but subtle differences in cloud shape, reflection, foreground movement, and edge detail remain manual decisions.
The reject filters include Exposure Issues, Misfires, and Documents and Receipts. Treat these as review queues, not automatic trash. A silhouette may look underexposed by design. A frame pointed at the ground could be a useful texture. A photographed contract might be important to the assignment even though it is not part of the gallery.
Understand the scores instead of trusting a badge
After analysis, switch among Selects, Rejects, and All. A Select badge means the photo met the criteria and thresholds you chose. It does not mean Lightroom compared the frame with your brand, narrative, or delivery requirements. A Reject badge signals a reason to inspect, not proof that the file has no value.
Open Culling Info from the information control. The Photo section exposes scores and explanations for subject sharpness, eye sharpness, open eyes, and other criteria. The Faces section lets you inspect each detected face. This matters in a group portrait because a good average can hide one important person with closed eyes.
Hovering over a badge also reveals why Lightroom assigned it. Use this explanation to tune thresholds. If too many acceptable images fail subject sharpness, loosen the control. If every frame in a long burst qualifies, tighten it or use stacking to compare near-duplicates. The correct threshold depends on subject motion, lens depth of field, output size, and the tolerance of the job.
Compare sequences in context
Never review a suggested keeper alone when it belongs to a burst. Compare adjacent frames at a useful magnification. At minimum, check the eyes, primary subject detail, expression, hands, background intrusions, and edge crop.
A disciplined sequence review works in three passes:
- Technical pass: remove true misses, severe exposure failures, accidental captures, and unusable focus.
- Comparison pass: choose the strongest expression or action peak from each similar group.
- Story pass: view the remaining set as a gallery and remove repetition, visual imbalance, and gaps.
This method prevents a common failure: selecting ten technically perfect versions of one moment while missing the transition that makes the story coherent. It also reduces the temptation to edit every usable file before deciding whether it belongs.
When two frames are close, prefer the one that solves the intended use. A horizontal composition may fit a website banner; a vertical frame may work for social delivery; a slightly wider image may protect space for a magazine crop. Those are design decisions that sharpness scoring cannot infer.
Use Face View carefully for portraits and events
Adobe added Face View to isolate each person and analyze eye sharpness and eye state. It is especially helpful for group portraits, ceremonies, conferences, and school photography, where checking every face at 100 percent takes time.
Begin with the people whose expressions are essential. In a wedding group, that might be the couple and immediate family. In a team photo, it may be every named participant. Confirm that Lightroom detected each face, then inspect any uncertain result manually. Glasses, partial profiles, hats, backlighting, motion, and faces near the edge can complicate detection.
Do not let Face View turn candid work into a hunt for mechanically open eyes. A half-closed eye during an expressive laugh may read naturally at normal viewing size. Conversely, a technically open eye can still look distracted. Facial analysis is an efficient inspection tool, not a portrait critic.

Stack duplicates before making final picks
Lightroom's Assisted Culling stack mode can group cloud photos by capture time or visual similarity. Visual similarity is useful for bursts and repeated poses. Time grouping is useful when an event naturally breaks into short sequences. Lightroom chooses a suggested stack cover, but you can change it.
Stacking is currently limited to cloud photos in Adobe's documented workflow. Local-folder users should not build a process around a button that is unavailable in their storage mode. They can still sort by capture time, use flags and ratings, and compare neighboring images manually.
Move the similarity or time slider gradually. An overly broad setting can merge moments that deserve separate choices. An overly narrow setting leaves dozens of almost identical frames ungrouped. After creating stacks, open each important one and confirm the cover based on expression, focus, gesture, and crop.
Convert suggestions into flags, ratings, and labels
Assisted Culling becomes valuable when its result fits the rest of your workflow. Lightroom can apply batch actions after analysis:
| Result | Practical action | Why it works |
|---|---|---|
| Strong technical candidates | Pick flag | Creates a fast positive review queue |
| Obvious technical failures | Reject flag | Keeps files recoverable during review |
| Manual portfolio choices | 4 or 5 stars | Separates taste from automated screening |
| Client alternatives | 3 stars | Preserves useful variety without crowding selects |
| Needs retouch or compositing | Color label | Carries production status into editing |
Choose one meaning for each rating and use it consistently. A five-star frame should not mean "sharp" on one job and "delivered" on another. Write the scheme into a studio checklist if more than one person touches the catalog.
Avoid the permanent Delete action on the first assisted pass. Apply Reject flags, filter to rejected files, inspect them once more, and delete only after the job is backed up and the keepers are confirmed. Storage is cheaper than recreating a missed wedding expression or once-only sports moment.
Build a repeatable workflow for different genres
For a portrait session, start with open eyes and eye sharpness at moderate thresholds. Compare expressions within each pose, then add ratings for the final variety of wide, medium, and close images. See our natural-light portrait guide for choices that make the capture set easier to cull.
For weddings and events, use conservative rejection and visual-similarity stacks. Preserve transitions and reaction shots. A technically imperfect frame may connect two polished images or document a person who appears nowhere else.
For sports and wildlife, use subject sharpness as a screening tool, then compare action position, ball or wing placement, background separation, and the subject's face. High frame rates create many files between meaningful peaks. Assisted Culling reduces the pile, but timing still wins.
For product and architecture work, exposure issues and misfires are useful starting points. Check reflections, label alignment, perspective, focus-stacking coverage, and bracket completeness manually. Do not remove a darker or brighter frame if it belongs to a bracketed set. Our exposure bracketing guide explains why those apparent duplicates need to stay together.
Common Assisted Culling mistakes
Setting strict thresholds before learning the scores
Run a representative album with moderate controls first. Compare badges with your own picks, then adjust. A threshold that works for studio headshots may fail on dance or wildlife.
Treating technical quality as creative quality
Sharp eyes do not fix a weak expression, awkward hand, distracting edge, or repetitive story. Technical screening should create a smaller creative review, not replace it.
Deleting rejects immediately
Use flags first. A missed face, intentional silhouette, bracket component, or panning frame can look like a failure to an automated check.
Ignoring multi-camera metadata
Incorrect capture times break sequence order. Mixed camera settings can also explain why one body produced more borderline focus or exposure results. Inspect EXIF data and synchronize clocks before the next assignment.
Sending every assisted select to the client
Clients pay for judgment as much as coverage. Remove repetition, balance the narrative, and match the delivery count before publishing proofs.

A practical quality-control checklist
Before you call the cull complete, confirm the following:
- Every important person, scene, product, or story beat appears at least once.
- Group portraits have been checked face by face.
- Brackets, panoramas, focus stacks, and composites remain complete.
- The final set includes intentional horizontal and vertical variety.
- Rejects received a manual review before deletion.
- Ratings and labels have consistent meanings.
- The source files and catalog are backed up separately.
- Metadata and capture time are correct enough to preserve sequence order.
Then edit a small sample before finalizing the selection. Noise reduction, crop, and color can rescue some borderline files, while aggressive crops can expose softness that looked fine in the grid.
Is Lightroom Assisted Culling worth using in 2026?
Yes, if you treat it as a technical assistant. It is most valuable on large, repetitive shoots where checking focus, eyes, misfires, and duplicate sequences consumes time. Face View, explainable scores, manual overrides, batch actions, and similarity stacking give photographers more control than a black-box "best photo" button.
It is less transformative for a slow landscape outing with 40 deliberate frames or any project where every exposure has a distinct role. It also does not remove the need for backups, consistent ratings, sequence review, or a final editorial pass.
The best 2026 workflow is simple: let Lightroom identify likely technical winners and obvious problems, inspect why it made those suggestions, override it whenever the story requires, and reserve the final selection for a human. That saves real time without flattening your photography into a score.