Night Cityscape Photography: How to Capture Stunning Urban Scenes After Dark
As an Amazon Associate, ExifGrabber earns from qualifying purchases.
Why Cities Come Alive at Night
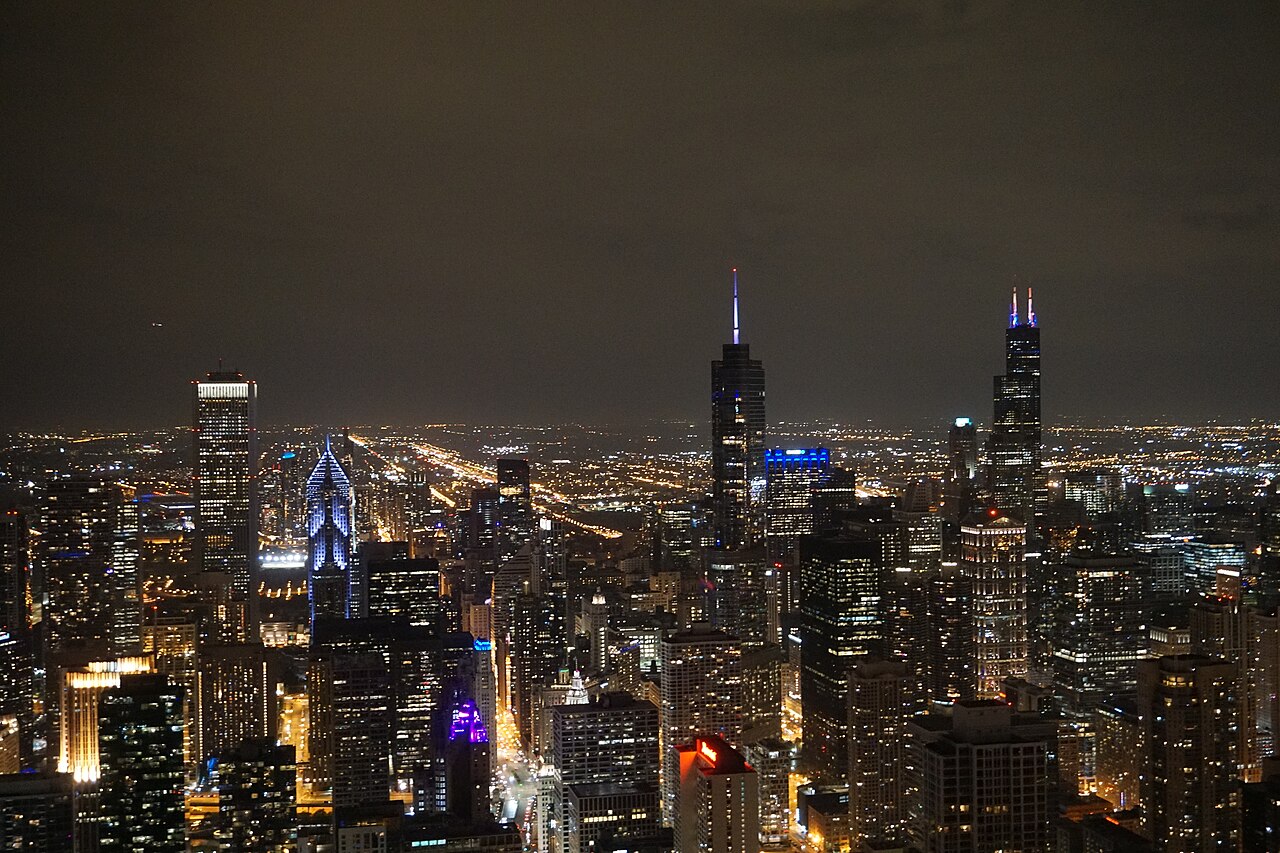
Cities transform after sunset. Buildings that look ordinary during the day become towers of light. Wet streets turn into mirrors. Traffic becomes ribbons of color. Night cityscape photography captures this transformation, and the technical challenges involved make the results feel earned in a way that point-and-shoot daytime photos rarely do.
The good news is that you do not need exotic gear. A camera with manual controls, a sturdy tripod, and some patience are enough to produce striking urban night images. The techniques are straightforward once you understand the principles behind them.

Essential Gear
Tripod. This is the one piece of equipment you absolutely cannot skip. Night cityscapes require shutter speeds measured in seconds, sometimes 30 seconds or longer. No amount of image stabilization can compensate for that. A travel tripod that you will actually carry is better than a heavy studio tripod that stays home. For dedicated tripod recommendations, see our best tripods for travel photography guide.
Remote shutter release. Even pressing the shutter button can introduce vibration on a tripod. A wireless remote shutter release or your camera's self-timer (2-second delay) eliminates this problem.
Fast wide-angle lens. A lens in the 16mm to 35mm range gives you the expansive field of view that cityscapes demand. A fast aperture (f/2.8 or wider) helps for handheld shots and gives you more flexibility, though for tripod-based long exposures the maximum aperture matters less. The Tamron 17-28mm f/2.8 and Sony FE 20mm f/1.8 G are excellent choices for full-frame mirrorless systems.
Spare batteries. Cold weather drains batteries faster, and long exposures consume more power. Carry at least one spare.
Camera Settings for Night Cityscapes
Night photography requires manual control. Here is a starting point that works for most urban night scenes:
Aperture: f/8 to f/11. You want a deep depth of field so the entire scene is sharp from foreground to background. This range also produces the starburst effect on point light sources (streetlights, building lights), which adds visual interest. Wider apertures (f/2.8 to f/4) dissolve those starbursts into soft circles.
ISO: 100 to 400. Keep it as low as possible since you are on a tripod and can afford long exposures. Higher ISO introduces noise that is especially visible in the large dark areas of night photos.
Shutter speed: 5s to 30s. This is the variable you adjust based on the scene's brightness and the effect you want. At 5 to 10 seconds, car headlights and taillights begin to streak. At 15 to 30 seconds, traffic becomes solid ribbons of light. Beyond 30 seconds (using Bulb mode), you can create very long light trails.
White balance: Daylight or Tungsten. Auto white balance often neutralizes the warm glow of city lights, which is half the appeal of night cityscapes. Set white balance to Daylight to preserve warm tones, or Tungsten for a cooler, more cinematic look. Since you are shooting RAW, you can always adjust this in post.
File format: RAW. Always. Night photos have extreme contrast between bright lights and deep shadows, and RAW gives you the latitude to recover detail in both. You can inspect and compare these settings across your shots using ExifGrabber to see exactly what worked best.
Timing: When to Shoot
The best time for night cityscapes is not full darkness. Blue hour, the 20 to 40 minutes after sunset, is the sweet spot. During this window, the sky retains a deep blue tone that provides separation between buildings and the sky. In full darkness, the sky goes pure black and buildings appear to float in a void, which can look flat.
Arrive at your location at least 30 minutes before sunset to scout compositions while you can still see. Set up your tripod, compose your shot, and start shooting as the sky transitions from golden hour to blue hour to full night. You will often find that your best frame was taken during the narrow blue hour window.
City lights typically turn on about 15 to 30 minutes after sunset. The intersection of blue sky and illuminated buildings is the magic moment.
Composition Techniques
Find reflections. Water is your best friend for night cityscapes. Rivers, harbors, rain puddles, and wet pavement all reflect city lights, doubling the visual impact and adding depth. Position yourself where you can include both the skyline and its reflection.
Use leading lines. Roads, bridges, railings, and rivers naturally guide the viewer's eye through the frame. A road receding into the city with light trails stretching toward a vanishing point is a classic composition that works because it combines leading lines with long-exposure motion.
Elevate your perspective. Rooftops, parking garages, hillsides, and observation decks give you a commanding view of the cityscape. High vantage points let you capture the full spread of the skyline without foreground clutter. Many cities have publicly accessible viewpoints that are popular with photographers.
Include a strong foreground. From ground level, use elements like a bridge railing, a bollard, a stretch of wet cobblestone, or a row of parked bicycles to anchor the composition and create depth. A night cityscape with only distant buildings can feel empty.
Embrace symmetry. Bridges reflected in still water, perfectly centered avenues, and mirrored building facades are powerful at night because the lights amplify the symmetry.
Focusing in the Dark
Autofocus struggles in low light. The camera hunts back and forth looking for contrast and often fails to lock on. Here are reliable alternatives:
Manual focus with Live View. Switch to manual focus, enable Live View on your LCD, and zoom in to 5x or 10x magnification on a bright point of light (a streetlight, an illuminated sign). Turn the focus ring until that point is as small and sharp as possible. Once focused, do not touch the focus ring.
Focus peaking. Most mirrorless cameras offer focus peaking, which highlights in-focus edges with a colored overlay. Enable it, switch to manual focus, and rotate the ring until the edges of your subject light up.
Pre-focus during daylight. If you arrive at your location before sunset, autofocus on your subject in good light, then switch to manual focus and do not touch the ring as darkness falls.
Creative Techniques
Light trails. Use a shutter speed of 10 to 30 seconds at a busy intersection or along a highway. The headlights and taillights of passing vehicles create red and white ribbons that draw energy and movement through the frame. For an in-depth guide, see our article on how to shoot light trails.
Star bursts. Shoot at f/11 to f/16 to turn point light sources into spiky starbursts. The number of spikes depends on your lens's aperture blade count. Lenses with an even number of blades produce that same number of spikes; lenses with an odd number produce twice as many.
Long exposure with ND filters. If you want extremely long exposures (2 to 5 minutes) during blue hour when there is still ambient light, a 6-stop or 10-stop ND filter lets you extend the shutter speed without overexposing. This turns moving clouds into streaks and water into glass. For more on ND filters, see our ND filter guide.
Intentional camera movement (ICM). During a long exposure, smoothly pan, tilt, or rotate the camera to create abstract streaks of light. This is an experimental technique that produces unpredictable, painterly results. Try vertical pans of a skyline for an effect that looks like light dripping down the frame.
Post-Processing Night Cityscapes
Night cityscape RAW files benefit from careful editing to balance the bright lights against the dark sky:
Reduce highlights. City lights often clip to pure white in the RAW file. Pull the Highlights slider down to recover detail in lit windows and signs.
Open shadows selectively. Push the Shadows slider up to reveal detail in dark areas, but do not overdo it. Some darkness is essential to the nighttime mood. If you lift shadows too aggressively, the image looks muddy and artificial.
Adjust white balance. Experiment with warmer and cooler tones. Warmer settings (5500K to 6500K) emphasize the golden glow of sodium vapor lights. Cooler settings (3500K to 4500K) give a modern, cinematic feel and make blue hour skies pop.
Apply noise reduction. Even at low ISO, long exposures generate some thermal noise. Apply moderate luminance noise reduction in Lightroom (20 to 30 on the slider) and zoom in to check the balance between noise removal and detail preservation.
Consider split toning. A subtle split tone with warm highlights and cool shadows can enhance the natural color contrast of night cityscapes, where warm artificial lights meet the cool tones of the night sky.
Safety and Etiquette
Night photography often means working alone in urban areas after dark. Choose well-lit, populated locations, especially when you are starting out. Tourist viewpoints, public parks, and busy bridges are generally safe. Let someone know where you are going and when you expect to return.
Be aware of your surroundings. A photographer focused on a long exposure with headphones in is an easy target. Keep your bag closed and your valuables out of sight.
Some buildings and bridges have restrictions on tripod use or commercial photography. If security asks you to move, comply politely and find another angle. Arguing is never worth it.
Locations to Start
Every city has iconic viewpoints, but do not overlook smaller scenes. A neon-lit alley, a rain-slicked street corner, or a single illuminated bridge can be more compelling than a wide skyline. Walk your city at night with fresh eyes and look for pockets of light, interesting geometry, and reflective surfaces.
Some classic starting points: waterfront promenades with skyline views, elevated highway overpasses, bridges that span rivers through the city center, and pedestrian plazas surrounded by illuminated architecture.
Wrapping Up
Night cityscape photography rewards patience and preparation. Arrive early, set up on a solid tripod, shoot through the blue hour transition, and experiment with different shutter speeds to control how light moves through your frame. The technical foundations are simple: low ISO, moderate aperture, and long shutter speeds. The creative possibilities are endless.